|
|
|
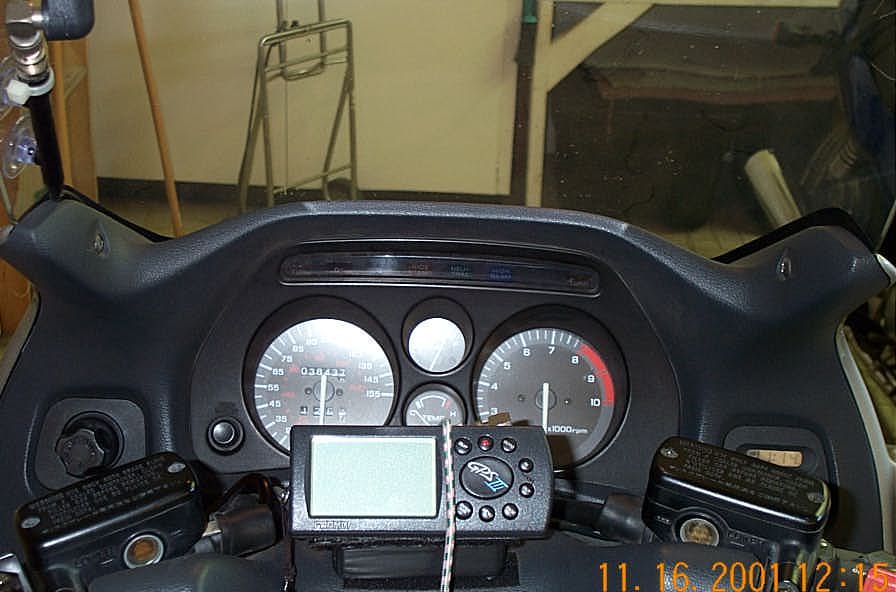
How I mounted my GARMIN GPS III on my ST One of the very first "farkles" I added to my ST was my Garmin GPS III. For the un-initiated, GPS stands for Global Positioning System, which uses satellites in space to determine to within 10 ft. accuracy your position anywhere on the planet. It also is capable of speed readings accurate to within tenth's of a MPH! There are tons more reasons both practical and fanciful for using a GPS, but I'll save them for another day... NOTICE: This is a personally designed and installed modification
on my motorcycle and it's parts. It is published here for the sole purpose of
showing how I did this. Anyone wishing to copy this method must assume any and
all risks of death or injury that could possibly occur as a result of something
(ANYTHING!) going wrong and causing an accident or other unfortunate event. In
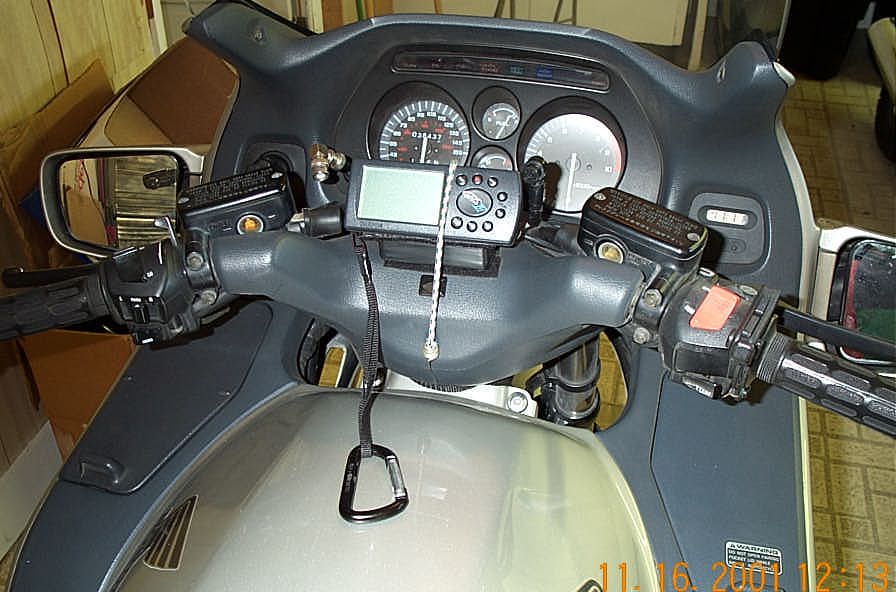
other words - YOU are responsible for all risks - not me! Design Criteria - I already owned the GPS when I got the ST, and since I was riding MUCH more on the ST I decided I needed to set it up for easy use. So, first criteria was ease of use. That meant easy to see without distraction from driving (ie: Safety!), as well as ease of removal since I didn't want to leave a $300+ toy unattended and out in the open when I was not on the bike. And being the frugal fellow that I am, I it to be at minimal cost. I also wanted little or nothing to show when the unit was not mounted on the bike, and I didn't want to drill any holes or make other permanent visible modifications to the bike... Pretty standard criteria for all my projects ;-) So, here's how I made my mount for the GPS that met all the requirements - for FREE! (Oh, I LOVE that word) :-) Well, truth be told, this mount set-up did cost something, but since I already had on hand all the items, it was already paid for... Here are a couple of pictures to show what the set up looks like with the GPS not on and then on the bike.
Here's the materials you'll need:
AS I mentioned, I had all on hand, but if you had to go out and buy every item, your total cost still wouldn't exceed $5.00, maybe $10.00 if you had to buy everything at the highest available prices (such as shock cords in a kit with other sizes). Here's how to make it:First, cut a piece of wood such that it fits inside the patch kit box. Initially I didn't do this and found the case alone a bit too flexible. Next, close the patch kit box on the wood, and then wrap (sticky back) a length of 1 in. wide "hook" Velcro around the box. Next, wrap some black electrical tape around the narrow sides of the box to help keep it closed and to help keep the Velcro tape on. Lastly, using 2 to 4 of the brads/nails, nail into the bottom of the box, through the Velcro. this additionally secures the tape as well as makes the whole assembly into one stable unit - now named the mounting block! Here are some detailed pictures of the completed mounting block:
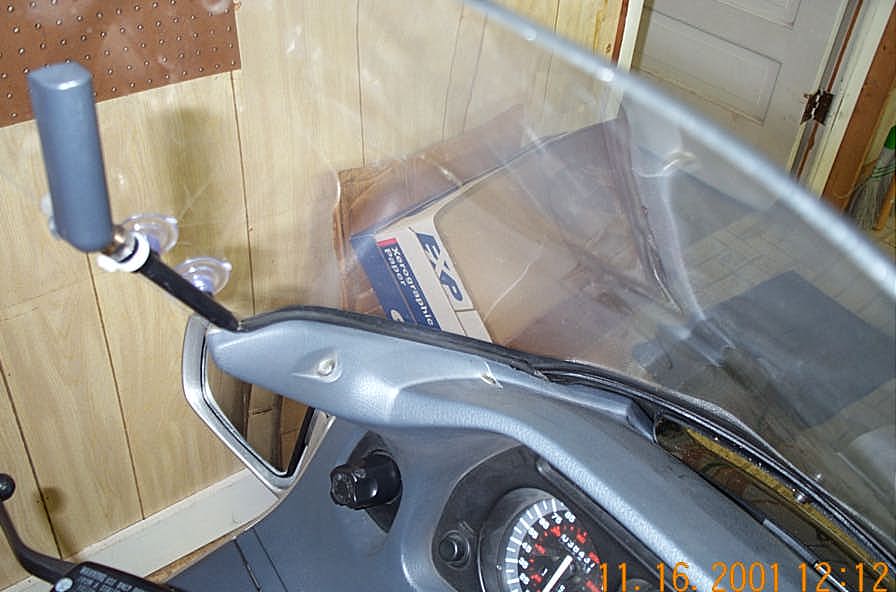
Next, clean the top of the garnish with some alcohol and apply a 4 in long, by 1 in. wide strip of the loop Velcro. I specify the loop because it's the "soft stuff" and is more pleasing when the mounting block is off the bike. A similar strip is presumed to already be affixed to the base of your GPS. This gives the parts most touched and in use the "soft" Velcro, while the tougher hook Velcro is entirely relegated to just the mounting block! Now, remove the handlebar garnish cover and at the bottom rear (as when sitting on the bike - so that's the part facing closest to the rider), use a knife or small file to make a notch just big enough to accept one of the small shock cord hooks. While the garnish is off, you can take the other shock cord and hook the two ends to the garnish mounting bracket (to either side of the one phillips head screw that secures the front of the garnish). Sorry I don't have pictures of this detail... You should be able to figure it out from the pictures above and below.
Notes: The shock cords aren't absolutely necessary, but since the garnish cover surface is not flat, the lack of full contact does allow the mount/GPS to rock a bit so that's what the shock cords are there for. Also note that I use a "D-Ring" on the lanyard as a safety device to retain the GPS to the bike in the event it should somehow come loose (has never happened in over 20K miles of running on this set up!) Also, a little side benefit is that the space between below the GPS and to the part of the mounting block facing the driver is just perfect for retaining my garage door key chain remote in perfect access position! Usage:It's simple. Set the mounting block squarely down on the strips on the handlebar garnish (underneath the shock cords of course). Then insert the GPS under the shock cords and on top of the mounting block. Then loop the lanyard around under the left handlebar and using the D-ring, clip it to the clutch hydraulic hose. Reverse to remove, though when just parking while out on the road, I only remove the GPS and then either carry in my pocket or lock it on my luggage to prevent theft. Can't get a lot simpler than that, and certainly not cheaper or more effective - IMHO. Extra Bonus Points:If you're really sharp, you will have noticed that the pictures of this setup were taken over a span of a couple of years. Though the mounting has
remained virtually unchanged, real eagle eyes will have spotted that I have done
something different with the GPS antenna. In the very first picture the antenna
is in it's normal, on-GPS position. And this works quite well just so.
|