|
|
|
Adding Auxiliary Power Taps on my Honda ST1100 My ingenious way of mounting auxiliary power taps for use on a Honda ST1100 NOTICE: This is a personally designed and installed modification on
my motorcycle and it's parts. It is published here for the sole purpose of
showing how I did this. Anyone wishing to copy this method must assume any and
all risks of death or injury that could possibly occur as a result of something
(ANYTHING!) going wrong and causing an accident or other unfortunate event. In
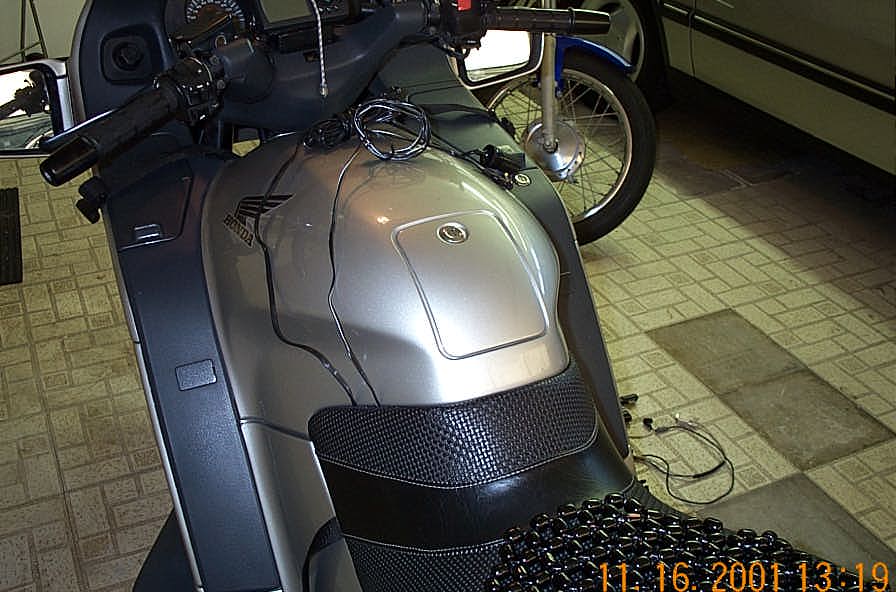
other words - YOU are responsible for all risks - not me! Design Criteria - Now that I had a bike I would ride for hours at a time, I wanted to add some "spice" to the ride. In my case, the "spice" meant some music, via a portable CD player, as well as my GPS and eventually my Laptop computer. That would make my first requirement some auxiliary power taps so I could run off the bike's power vs. disposable batteries. Being the frugal guy that I am, my second consideration was minimal cost. I also decided on the following additional criteria that were important to me: It had to be quick and easy to use, it needed to be relatively weatherproof, and I wanted nothing "showing" when the taps were not in use. And, lastly, - I didn't want to drill any holes or make any other "permanent" modifications to the bike. So with these criteria here's what I came up with...
What I needed....
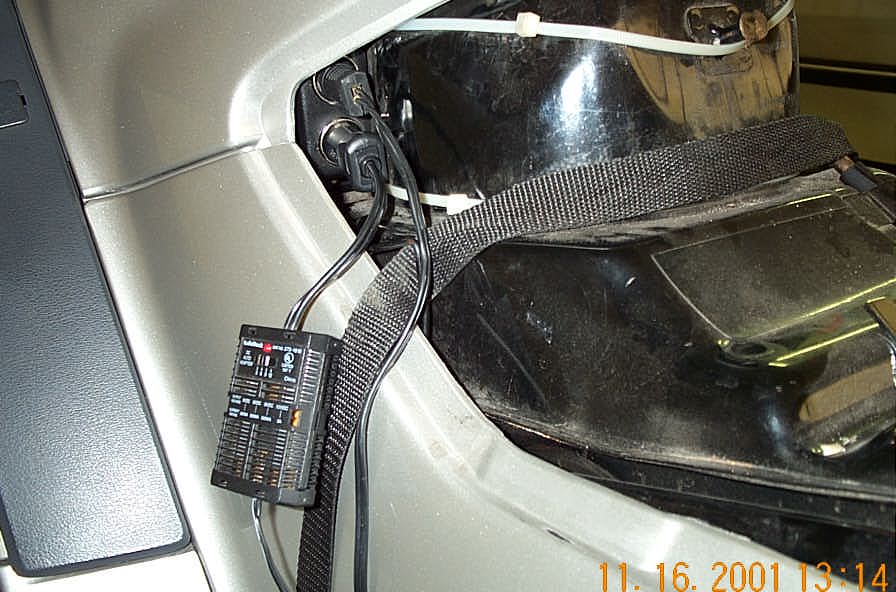
I bought the power tap at some auto parts store, or maybe it was Rat Shack - don't recall... It came complete with the inline fuse and the wire was long enough to reach my aux. fuse panel next to the battery. Total cost < $5.00!)
I already had the following on hand:
Using the system -This is pretty simple - Remove seat, plug in and return seat to operating position. Reverse for disassembly. You may note that originally I was using the 2nd tap for the CD player power converter and tucking it in beside the side panel. I found I got a lot of engine noise that way so I later used an extension cord to run a single cord up to the tankbag, and there I split it to two taps and keep the converter and wiring in the side pocket of the tank bag. It reduced the interference substantially. Conclusion -I hope you find this information useful should you be faced with the same problems to solve. I am very happy with how this works for me. Feel free to use and/or modify this design as you see fit. And don't forget to GO RIDE! :-) Comments/questions welcome to wgr@sprynet.com
|